Want to bend Night City's rules a little? Good. This Cyberpunk 2077 console command guide lets you add eddies, spawn iconic weapons and even enable god mode. The idea is to turn the game into your personal sandbox. Of course, you can break it whenever you like, too.
We'll get the console working first, because it isn't available by default. Then I'll cover commands that actually matter, from Phantom Liberty-specific options to essential cheats.
How do you enable console commands in Cyberpunk?
First, one thing to understand: CD Projekt Red didn't include a player-accessible console in the base game. Enabling console commands requires a mod. Cyber Engine Tweaks (CET) is the clever tool that unlocks the console and much more. It's PC-only, so Xbox and PlayStation owners are out of luck.
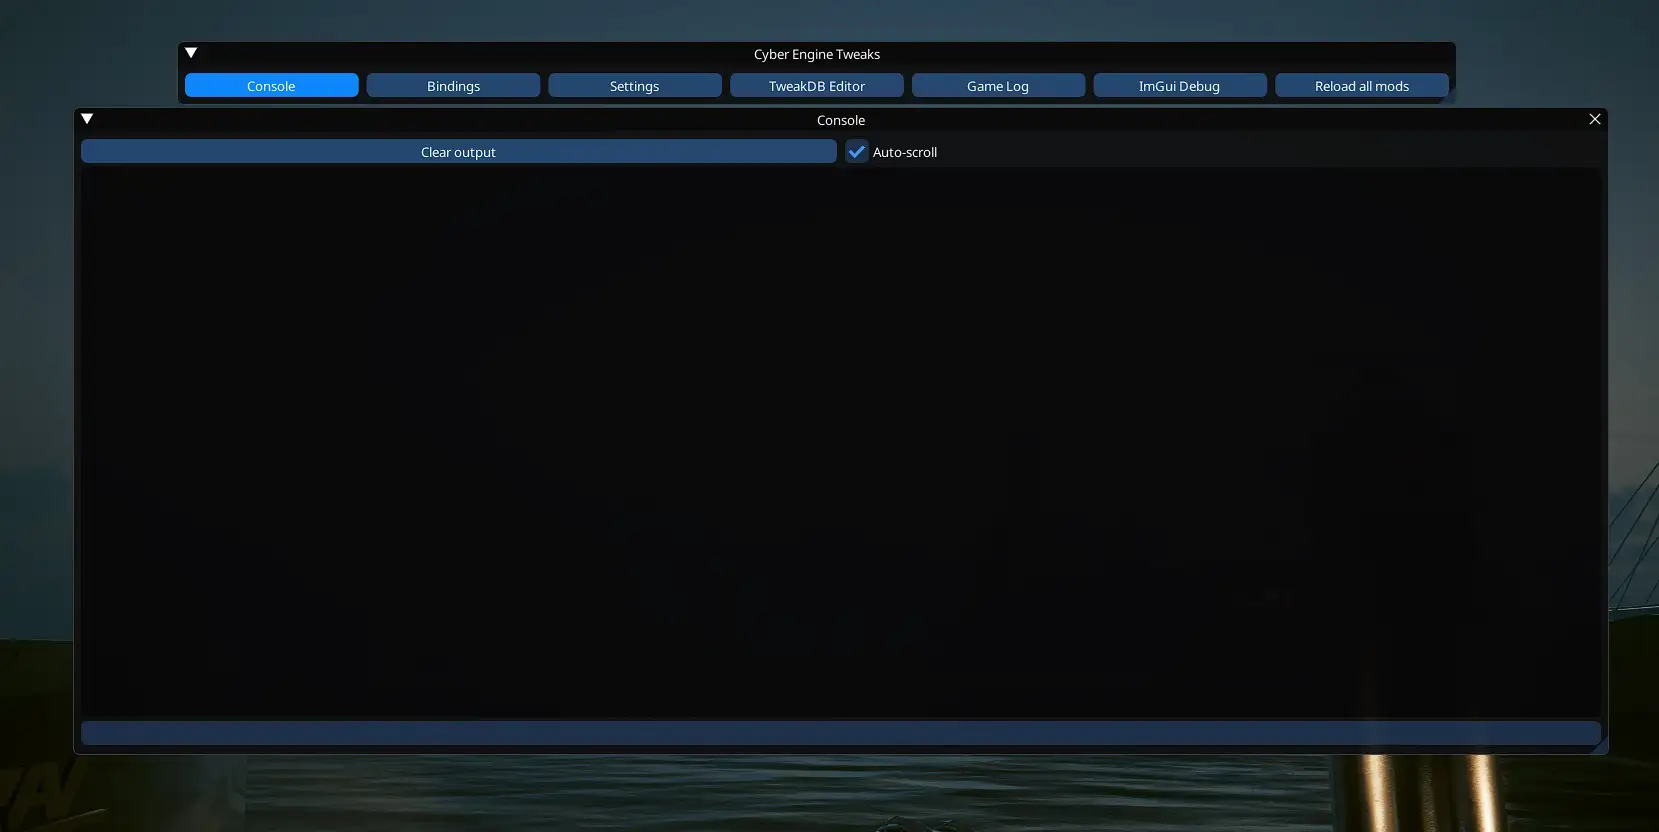
Getting it running is straightforward:
- Download Cyber Engine Tweaks. The only place you should get it from is Nexus Mods, to make sure you have the latest and safest version.
- Find your game folder. The main installation directory. For Steam, usually Steam Library/steamapps/common/Cyberpunk 2077; for GOG, GOG Games/Cyberpunk 2077.
- Extract and copy the files. Drag everything from the downloaded ZIP into the main Cyberpunk 2077 folder. The mod's bin folder should merge with the existing bin folder.
- Launch the game. CET asks you to assign a console hotkey. Tilde (~) is the traditional choice for a reason. I use ctrl+F4, because I'm special.
- Or use Vortex.
For the easiest way to install in one click, you will need Vortex. You can read about setting up and installing mods in my guide.
How to install mods on Cyberpunk via Vortex
Commands for money, levels and Street Cred
Tired of being broke in Night City? There's a simple command for that.
Add eddies: Game.AddToInventory('Items.money', 50000)
Want to skip leveling or just need a boost? You can set your levels directly.
Set character level: Game.SetLevel('Level', 60, 1)
Raise Street Cred: Game.SetLevel('StreetCred', 50, 1)
Attribute and perk points
This is where you can really experiment with builds. There are two main ways to add points: a direct command or spawning a skillbook item, which feels a little more natural within the game's mechanics.
Attribute points
Change the numbers to get the attribute points you need.
Skillbook method: Game.AddToInventory('Items.AttributePointSkillbook', 1)
Direct method: PlayerDevelopmentSystem.GetInstance(Game.GetPlayer()):GetDevelopmentData(Game.GetPlayer()):AddDevelopmentPoints(5, gamedataDevelopmentPointType.Attribute)
Perk points
Change the numbers to get the perk points you need.
Skillbook method: Game.AddToInventory('Items.PerkPointSkillbook', 1)
Direct method: PlayerDevelopmentSystem.GetInstance(Game.GetPlayer()):GetDevelopmentData(Game.GetPlayer()):AddDevelopmentPoints(3, gamedataDevelopmentPointType.Primary)
Add Relic points
In Phantom Liberty, you can max out the new perk tree.
PlayerDevelopmentSystem.GetInstance(Game.GetPlayer()):GetDevelopmentData(Game.GetPlayer()):AddDevelopmentPoints(-1, gamedataDevelopmentPointType.Espionage)
Iconic weapons and mods
Iconic weapons and mods
Why wait until you find the best equipment? Just give it to yourself.
Johnny Silverhand's Malorian Arms 3516: Game.AddToInventory('Items.Preset_Silverhand_3516', 1)
Skippy: Game.AddToInventory('Items.Preset_Yukimura_Skippy_PostQuest', 1)
Mantis Blades: Game.AddToInventory('Items.MantisBlades', 1)
Other weapons or mods need their specific item IDs. That gives you powerful control to adjust the game however you want.
It's similar to the method in my guide to romancing Judy as male V: commands make the game ignore its own scripted rules, using files the developers left in place.
Essential cyberware and crafting
With update 2.3, raising your Cyberware Capacity matters. Use these commands:
Legendary capacity upgrade: Game.AddToInventory('Items.CWCapacityPermaReward_Legendary', 1)
Chimera Core for Tier 5+ mods: Game.AddToInventory('Items.Q302_Chimera_Core', 1)
If you craft, waiting for materials is tedious. You can skip that too.
Legendary materials: Game.AddToInventory('Items.LegendaryMaterial1', 1000)
Epic materials: Game.AddToInventory('Items.EpicMaterial1', 1000)
How do I find the item ID?
You'll need the exact ID for that jacket or gun. A prepared list is easiest, but knowing how to find IDs yourself helps.
Option 1: Manual method (via wiki)
The ability to find ID on your own is a useful skill. It’s a simple process that gives you the freedom to find anything in the game. Here's how it works:
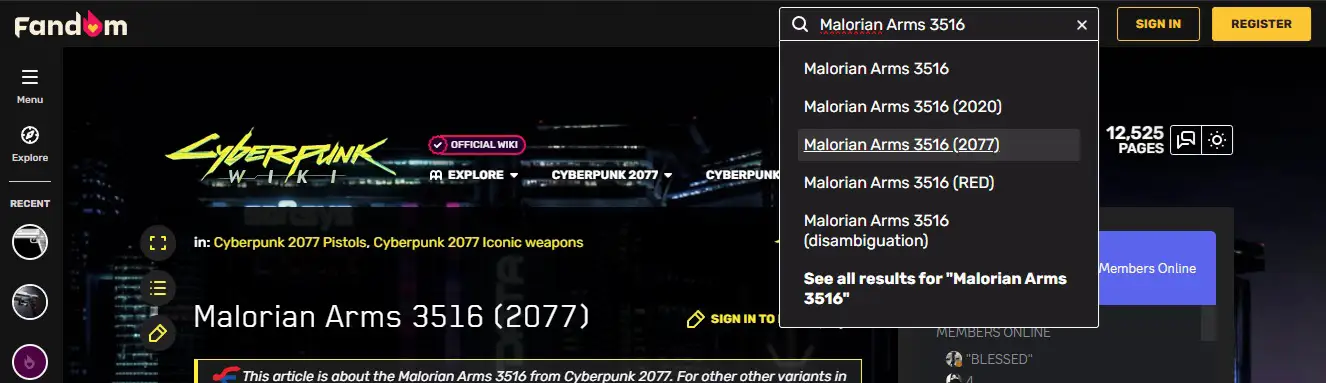
- Visit the Cyberpunk 2077 Wiki.
- Find your item using the search bar. For this example, we'll use Johnny Silverhand's iconic handgun.
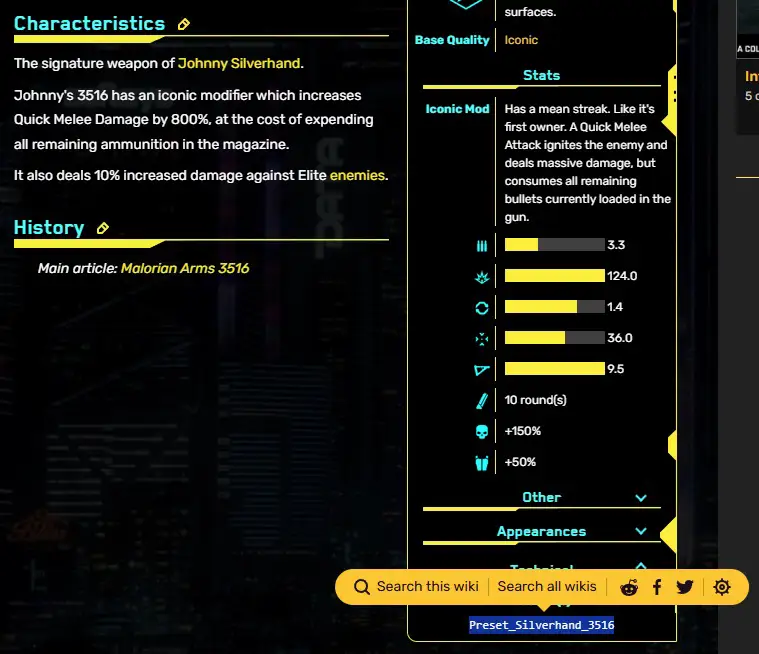
- Copy the console ID. Look for the information box, usually on the right of the item page. Under Technical or a similar section, find Console Command ID. It looks something like Preset_Silverhand_3516. That's the text you need.
- Insert the ID into the command. The format is Game.AddToInventory("Items.[Item ID]", 1). For Johnny's pistol, the complete command is Game.AddToInventory("Items.Preset_Silverhand_3516", 1).
- Paste the complete command into CET's in-game console and press Enter. The item is added to your inventory. Simple as that.
Option 2: the all-in-one command spreadsheet
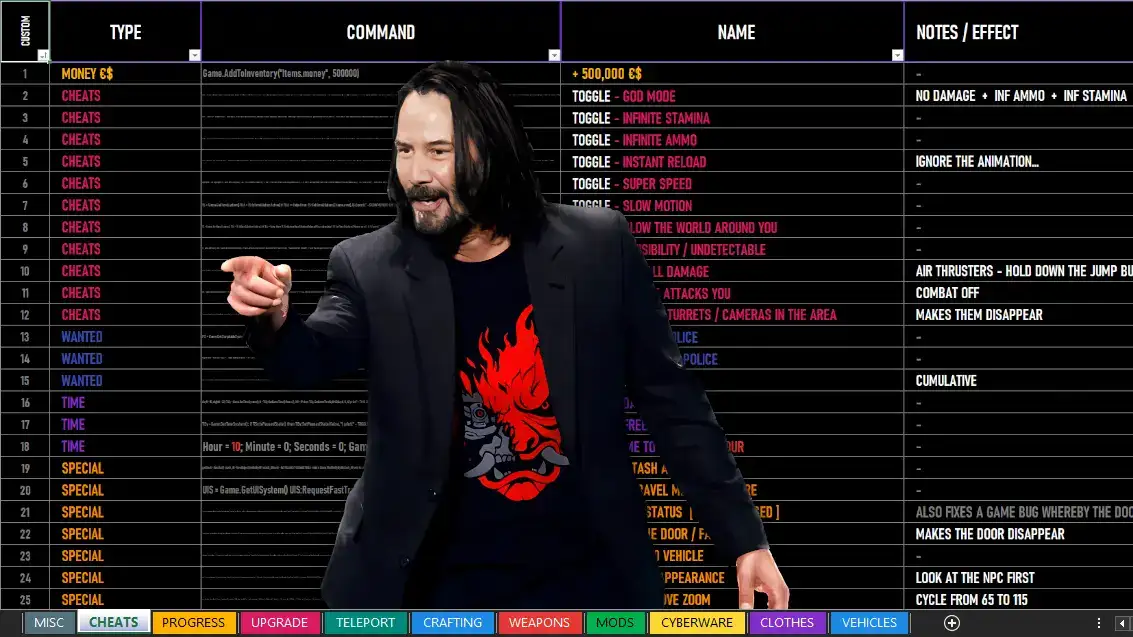
Honestly, forget the wiki unless you enjoy digging through it like I do. Someone has done the hard work for us. Silverhandsome's Categorized All-In-One Command List on Nexus Mods is one of the most useful tools available. It's a huge spreadsheet with organized tabs for weapons, clothes, vehicles and even teleport coordinates. Find what you need, copy the full command and paste it.
God mode, teleportation and weather control with EasyTrainer
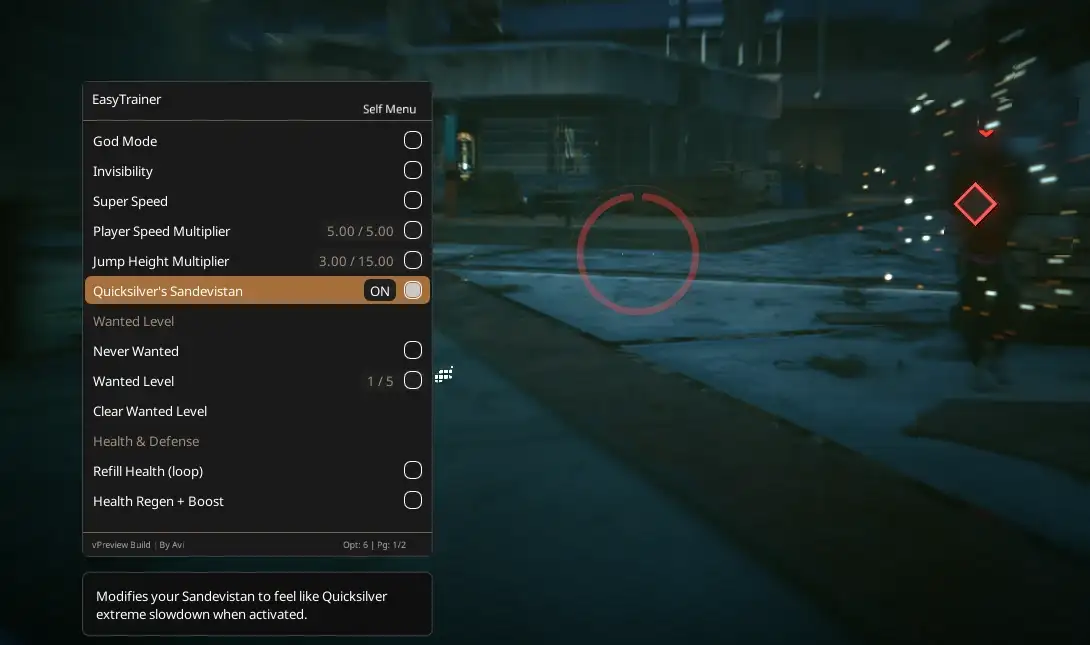
This full in-game trainer feels like having a developer toolkit at your fingertips. It does what other mods do, plus a thousand things on top, all in a clean, controller-friendly menu opened with one key, F4 by default.
Teleportation through console commands
Teleport commands move V instantly, but require exact coordinates. Find them first, then use them.
Step 1: Get your coordinates
Go to the exact place you want to save, open the console and find out your location with this command: print(Game.GetPlayer():GetWorldPosition())
The console will display a line in this format: ToVector4{x = -2503.0552, y = 56.46286, z = 4.1129227, w = 1}. These numbers x, y and z are what you need.
Step 2: build the teleport command
Here's the complete command template. It looks intimidating, but you only need to copy and paste it.
Game.GetTeleportationFacility():Teleport(GetPlayer(), ToVector4{x=YOUR_X, y=YOUR_Y, z=YOUR_Z, w=1}, ToEulerAngles{roll=0, pitch=0, yaw=0})
All you have to do is replace YOUR_X, YOUR_Y, and YOUR_Z with the numbers you got in the first step.
Step 3: Put everything together and teleport
Using your new coordinates (x = -2503.0552, y = 56.46286, z = 4.1129227), the final command to insert into the console will look like this:
Game.GetTeleportationFacility():Teleport(GetPlayer(), ToVector4{x=-2503.0552, y=56.46286, z=4.1129227, w=1}, ToEulerAngles{roll=0, pitch=0, yaw=0})
Press Enter, and you're instantly teleported. ☺️
The warning still applies: be extremely careful. Teleporting into a wall or skipping a quest trigger can easily break the game. Always save before teleporting anywhere.
Interesting teleport destinations and example coordinates
This list goes beyond the basics, providing instant access to some of the game's most memorable, hidden and normally inaccessible locations. From decadent penthouses to the cold reaches of space, these are places you'll want to revisit. Major spoilers guaranteed.
| Location | Full console command |
|---|---|
| V's mansion | Game.GetTeleportationFacility():Teleport(GetPlayer(), ToVector4{x=-1341.383545, y=1242.970337, z=111.100006, w=1}, ToEulerAngles{roll=0, pitch=0, yaw=0}) |
| Konpeki Plaza penthouse | Game.GetTeleportationFacility():Teleport(GetPlayer(), ToVector4{x=-2220.772705, y=1765.388916, z=308.000000, w=1}, ToEulerAngles{roll=0, pitch=0, yaw=0}) |
| Arasaka Orbital Station | Game.GetTeleportationFacility():Teleport(GetPlayer(), ToVector4{x=4743.650879, y=-1091.755127, z=1310.439575, w=1}, ToEulerAngles{roll=0, pitch=0, yaw=0}) |
| The Peralez apartment | Game.GetTeleportationFacility():Teleport(GetPlayer(), ToVector4{x=-75.815399, y=-113.607819, z=111.161728, w=1}, ToEulerAngles{roll=0, pitch=0, yaw=0}) |
| Unfinished casino | Game.GetTeleportationFacility():Teleport(GetPlayer(), ToVector4{x=934.451233, y=1458.630981, z=242.120010, w=1}, ToEulerAngles{roll=0, pitch=0, yaw=0}) |
| Grand Imperial Mall | Game.GetTeleportationFacility():Teleport(GetPlayer(), ToVector4{x=-2278.209473, y=-1992.328613, z=20.570023, w=1}, ToEulerAngles{roll=0, pitch=0, yaw=0}) |
| Nomad starting area | Game.GetTeleportationFacility():Teleport(GetPlayer(), ToVector4{x=-3235.881592, y=-6146.751465, z=96.834175, w=1}, ToEulerAngles{roll=0, pitch=0, yaw=0}) |
| Voodoo Boys data fortress | Game.GetTeleportationFacility():Teleport(GetPlayer(), ToVector4{x=-1661.448242, y=-1869.755859, z=54.992889, w=1}, ToEulerAngles{roll=0, pitch=0, yaw=0}) |
| Arasaka Tower jungle | Game.GetTeleportationFacility():Teleport(GetPlayer(), ToVector4{x=-1449.256470, y=118.300171, z=321.639038, w=1}, ToEulerAngles{roll=0, pitch=0, yaw=0}) |
| Clouds | Game.GetTeleportationFacility():Teleport(GetPlayer(), ToVector4{x=-625.404236, y=794.564392, z=132.252228, w=1}, ToEulerAngles{roll=0, pitch=0, yaw=0}) |
Important notes and console troubleshooting
Before typing in any command, make a backup copy of the save files.
- ✅ Open %userprofile%\Saved Games\CD Projekt Red\Cyberpunk 2077 and copy your saves. Do it now. Press Win+R and paste the path.
- ❌ Commands can permanently break quests. Spawning a quest item before you're meant to receive it can make the quest impossible to finish. Commands that change quest outcomes, such as Game.SetDebugFact("q112_takemura_dead",0) to save Takemura when the story says he should die, can have unpredictable consequences later.
- 🤔 Spawned equipment scales to your current level. Spawn an iconic weapon at level 5, and you'll get a weak level-5 version. You still need to upgrade it.
If the console won't open, disable other overlays, such as Discord or Steam. They can interfere. Running the game in borderless windowed mode may also help.
Frequently asked questions
Why isn't my Cyberpunk 2077 money command working?
It's almost always a syntax error. The correct command is Game.AddToInventory("Items.money", 50000). Make sure Items.money is inside quotes, uses the correct capitalization and is followed by a comma. If other commands work, this one contains a typo.
Are there any built-in console commands in Cyberpunk 2077?
No. The vanilla game has no player-accessible command console. Console commands require the PC version with Cyber Engine Tweaks installed.
Can you use console commands on Xbox One or PlayStation?
Unfortunately, no. Console commands run on mods that embed code into game files, and this is only possible on PC. Console platforms do not support such modding for Cyberpunk 2077.
Can you use Cyberpunk 2077 console commands without mods?
No, that's impossible. Since there is no built-in console in the game, a mod like Cyber Engine Tweaks is absolutely necessary to add a console overlay and give the game the ability to handle commands you type.